Rollator LED Frontleuchte 1600 Lumen mit Batteriepaket

Verbessern Sie Ihr Veloped mit dieser sehr leistungsstarken 1600 Lumen LED-Frontleuchte.

Art.Nr.: 11-90-033
Lagerstatus: Im Lager
Lieferzeit: 2-4 Werktage
99 €
Inkl. MwSt.: 15,81 € (19%)
St.

Rollator LED Frontleuchte 1600 Lumen mit aufladbarem Batteriepaket

Zweck der Leuchte:   Um zu sehen
Lichtstärke:                 1600 Lumen

Verbessern Sie Ihren Rollator mit diesem leistungsstarken 1600 Lumen LED-Scheinwerfer, der dafür entwickelt wurde, Ihren Weg mit Präzision und Leichtigkeit zu beleuchten. Ausgestattet mit einem fortschrittlichen blendfreien Linsendesign sorgt dieser Scheinwerfer für maximale Sichtbarkeit, ohne andere zu blenden. Ob bei schlechten Lichtverhältnissen oder völliger Dunkelheit – die verschiedenen Lichtmodi (25%, 50%, 100% und Blitz) ermöglichen es Ihnen, die Helligkeit Ihren Bedürfnissen anzupassen.

Diese Hochleistungsleuchte verfügt über 2 Samsung LH351D LEDs, die bis zu 1600 Lumen liefern und in einem Spannungsbereich von 5V bis 15V DC arbeiten. Zudem ist ein eingebauter Thermostatchip enthalten, der Überhitzung verhindert und für eine sichere und gleichmäßige Leistung sorgt.

Das Zubehör umfasst eine GoPro-Halterung, eine Gabelhalterung für die Leuchte, sowie alle notwendigen Muttern und Schrauben für eine einfache Installation. Mit einer großzügigen Kabellänge von 130 cm und einer IP65-Wasserdichtigkeitsklasse ist dieser Scheinwerfer bestens für den Außeneinsatz geeignet.

Beleuchten Sie Ihre Reise mit diesem robusten, hellen Scheinwerfer und genießen Sie erhöhte Sicherheit bei jedem Abenteuer.

Maximale Lichtstärke: 1600 Lumen
Spannung: 5V-15V DC
LED-Typ: 2*Samsung LH351D LED
Modi: 25%-50%-100%-Blitz
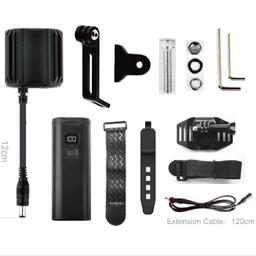
Zubehör: GoPro-Halterung + Gabelhalterung für die Leuchte sowie Muttern und Schrauben
Kabellänge: 130 cm
Wasserdichtigkeitsstufe: IP65
Stromanzeige: Wenn die Eingangsspannung unter 6,5V liegt, zeigt die Stromanzeige Rot an. Das bedeutet jedoch nicht, dass die Batteriespannung niedrig ist, wenn die Eingangsspannung für das Licht auf 6V oder weniger eingestellt ist.

Benutzerhandbuch

Die Dokumentation für dieses Produkt enthält die Handbücher und die nachstehenden Bedienungsanleitungen. Sie können die Dokumentation online lesen oder sie für den lokalen Gebrauch herunterladen.

1600 Lumen Trionic LED Front Light with Battery Pack

This manual both shows how you attach the light holder and the light on a Walker (left column below) and also how you attach them on a Veloped (right column below).

In the left-hand photo, A shows the holder attachment parts for a Walker (2 screws + 2 washers). B shows the holder attachment parts for a Veloped (1 screw + 1 knurled nut + 1 nut).

1600 Lumen Trionic LED Front Light with Battery Pack

Attaching the Light Holder

Instructions for a Walker
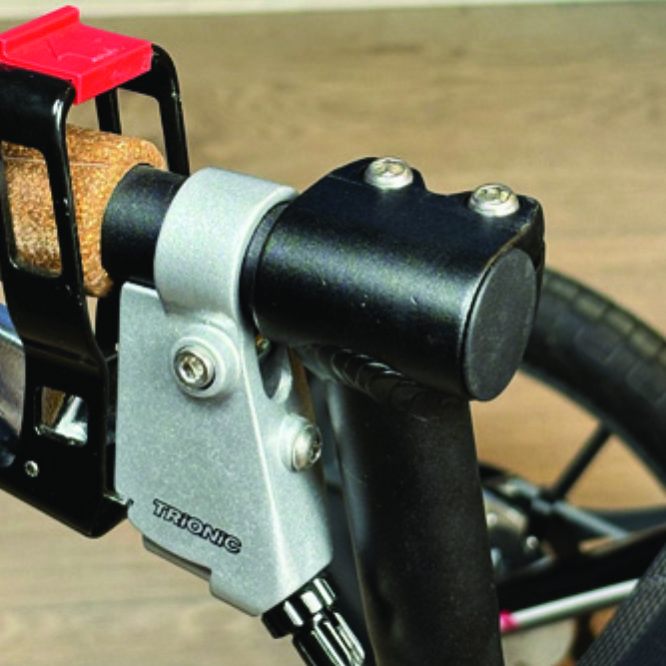
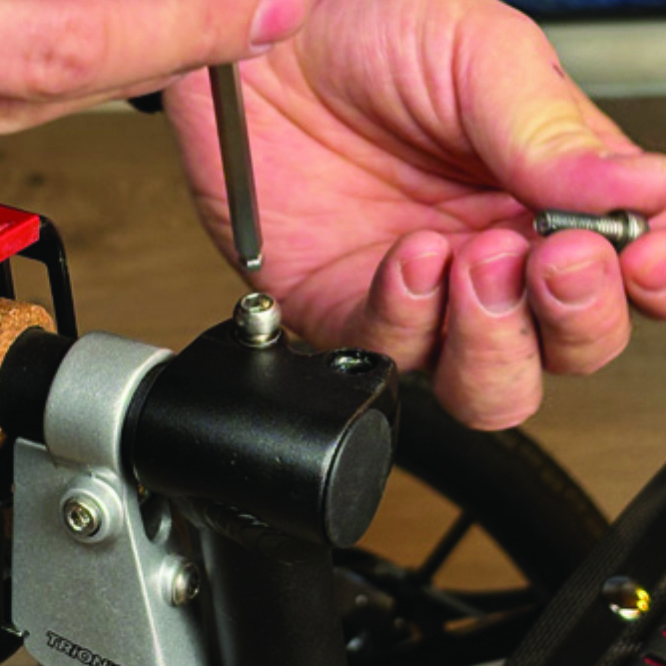
On top of the black semi-vertical tube, locate the two screws that clamp the grip tube, situated in front of the brake lever.
A1. On top of the black semi-vertical tube, locate the two screws that clamp the grip tube, situated in front of the brake lever.
Loosen both screws with the 5mm allen key included with the LED light.
A2. Loosen both screws with the 5mm allen key included with the LED light.
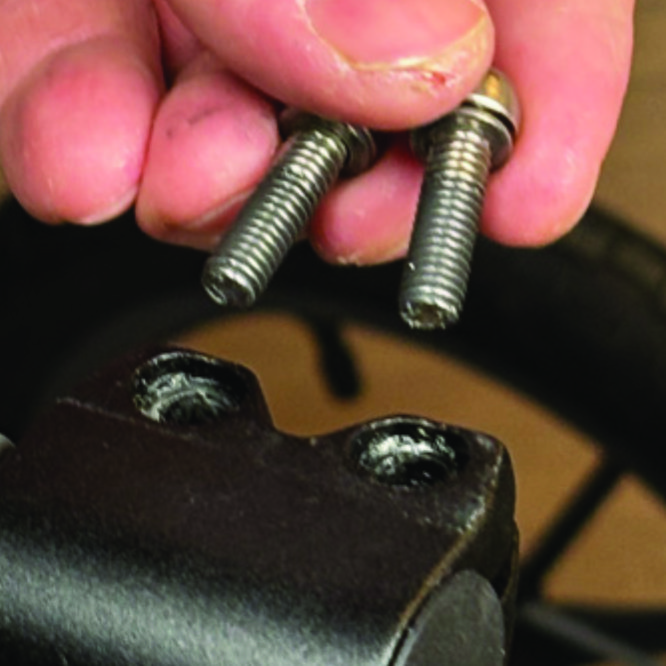
Remove the two screws from the grip clamp.
A3. Remove the two screws from the grip clamp.
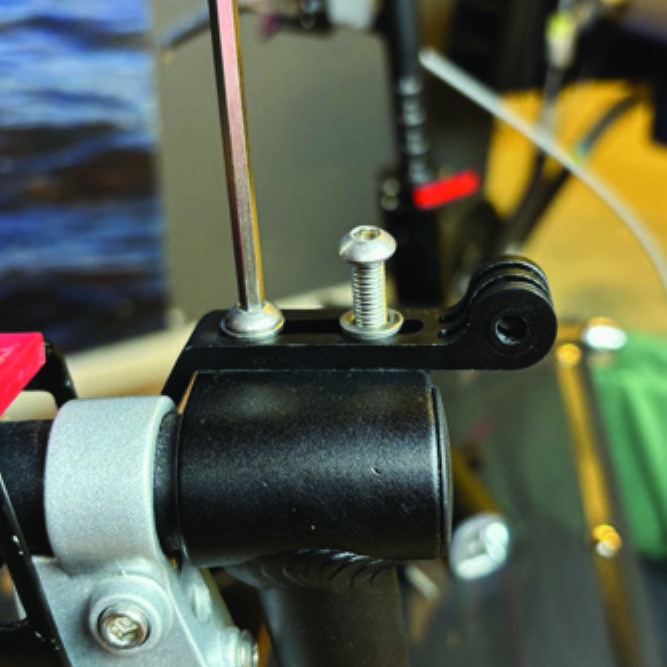
Place the light holder on top of the grip clamp, with its circular and slotted light attachment pointing forwards and upwards. Enter the two screws with washers into the holes of the clamp.
A4. Place the light holder on top of the grip clamp, with its circular and slotted light attachment pointing forwards and upwards. Enter the two screws with washers into the holes of the clamp.
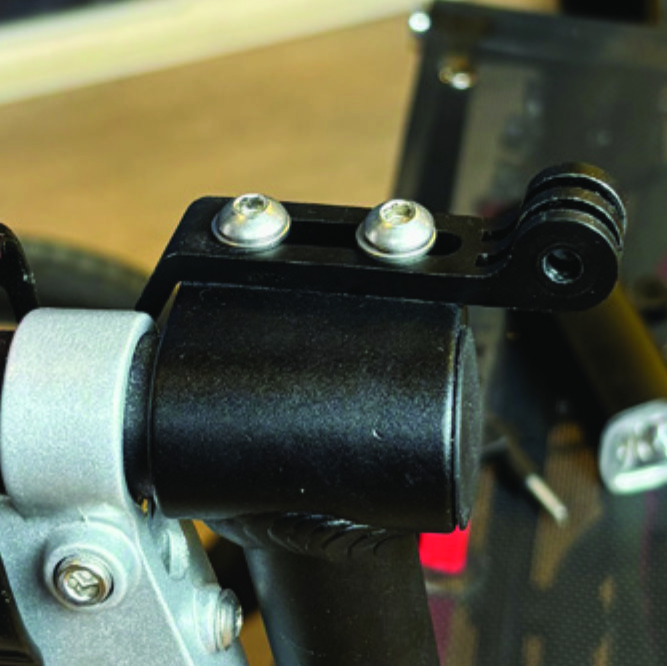
Tighten the two screws with the 5mm allen key. NOTE: It is important that you tighten the screws properly as they secure the grip tube with its rubber grip and brake lever.
A5. Tighten the two screws with the 5mm allen key. NOTE: It is important that you tighten the screws properly as they secure the grip tube with its rubber grip and brake lever.

Instructions for a Veloped

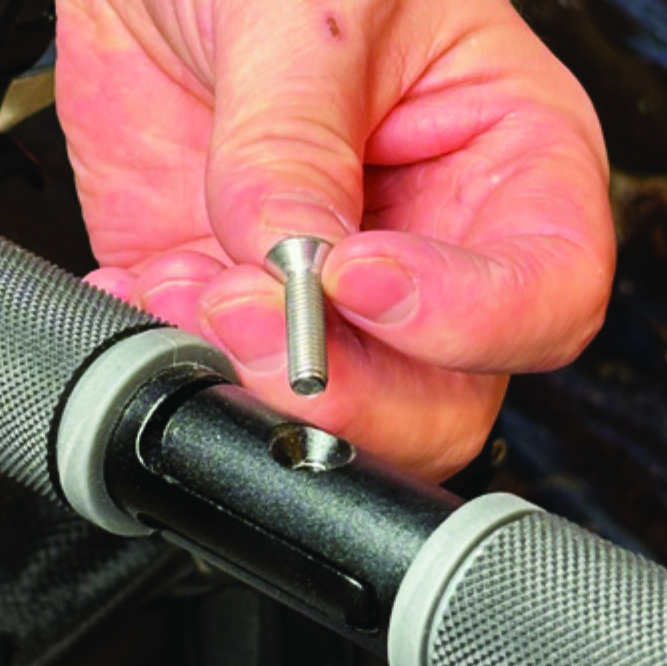
Locate the screw at the center folding hinge of the U-shaped grip bar of the Veloped. Unscrew the screw with the included 4mm allen key and remove it.
A1. Locate the screw at the center folding hinge of the U-shaped grip bar of the Veloped. Unscrew the screw with the included 4mm allen key and remove it.
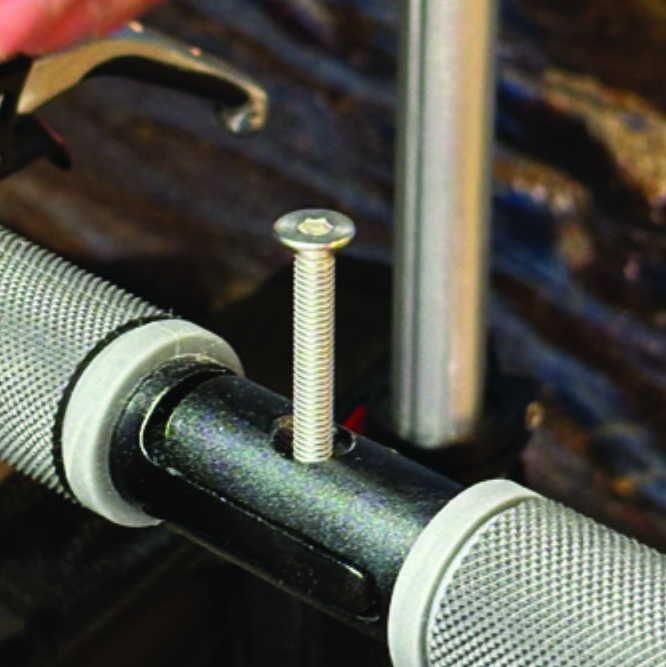
Replace the old screw with the longer screw included with the LED light. Attach the longer screw to the hinge and tighten it with the 4mm allen key.
B2. Replace the old screw with the longer screw included with the LED light. Attach the longer screw to the hinge and tighten it with the 4mm allen key.
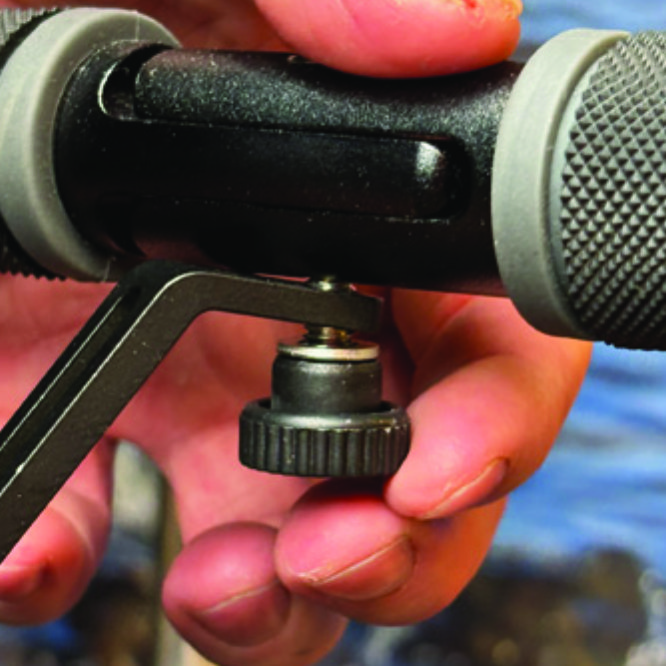
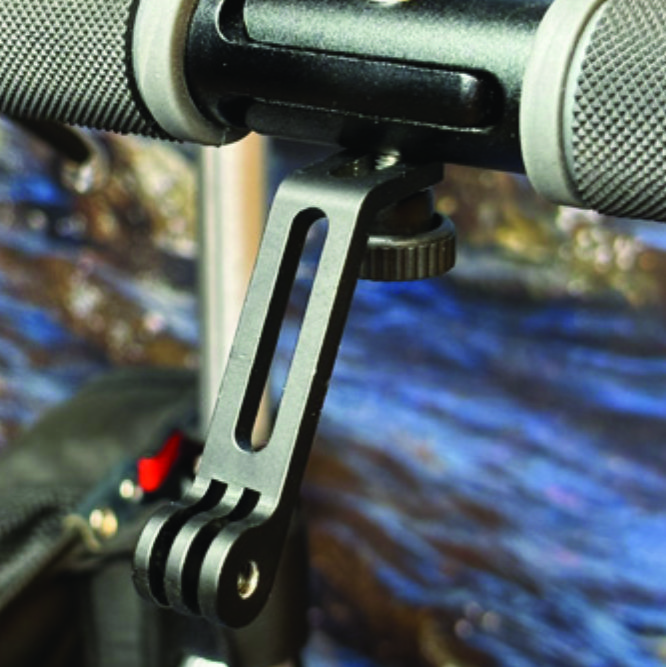
Attach the short angled end of the light holder to the lower end of the screw, on the downside of the U-shaped grip bar. The holder should point downwards. Fasten the holder with one washer and the knurled nut that you tighten with your fingers.
B3. Attach the short angled end of the light holder to the lower end of the screw, on the downside of the U-shaped grip bar. The holder should point downwards. Fasten the holder with one washer and the knurled nut that you tighten with your fingers.
For a more secure holder attachment, avoiding the holder to unintentionally turn sideways, replace the knurled nut with the included stainless steel nut and tighten it with a 10mm spanner.
B4. For a more secure holder attachment, avoiding the holder to unintentionally turn sideways, replace the knurled nut with the included stainless steel nut and tighten it with a 10mm spanner.
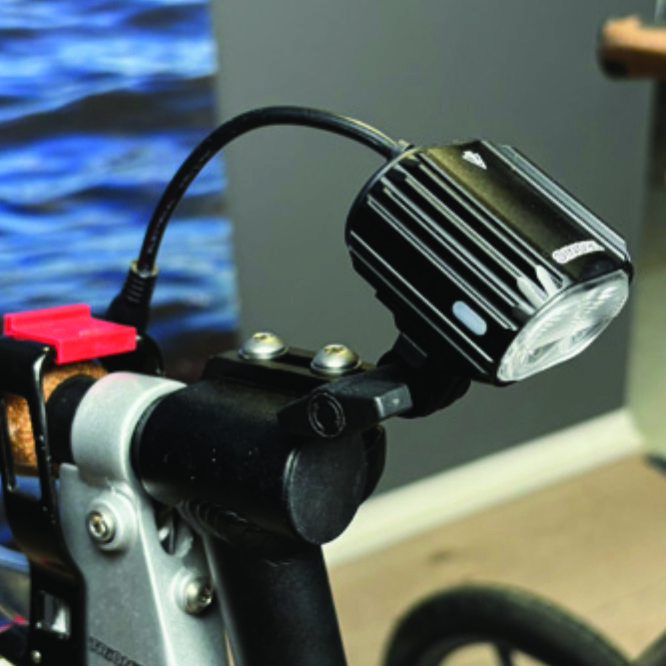
This photo shows the light holder as correctly attached.
B5. This photo shows the light holder as correctly attached.

Attaching the LED Light to the Holder

Instructions for a Walker
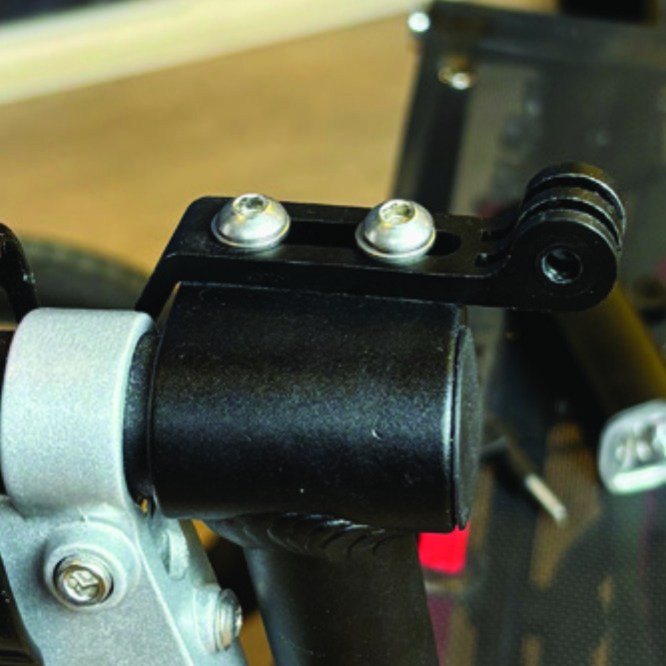
Identify the circular front end of the light holder, with two slots for attaching the light.
A6. Identify the circular front end of the light holder, with two slots for attaching the light.
Push the slotted bracket of the light into the slots of the holder and make sure they are aligned. Seen in the traveling direction of the Walker, enter the included wingnut from the left and tighten it.
A7. Push the slotted bracket of the light into the slots of the holder and make sure they are aligned. Seen in the traveling direction of the Walker, enter the included wingnut from the left and tighten it.

Instructions for a Veloped

Locate the screw at the center folding hinge of the U-shaped grip bar of the Veloped. Unscrew the screw with the included 4mm allen key and remove it.
B6. Locate the screw at the center folding hinge of the U-shaped grip bar of the Veloped. Unscrew the screw with the included 4mm allen key and remove it.
Identify the circular front end of the light holder, with two slots for attaching the light.
B7. Identify the circular front end of the light holder, with two slots for attaching the light.

Placing the Battery Pack

Instructions for a Walker
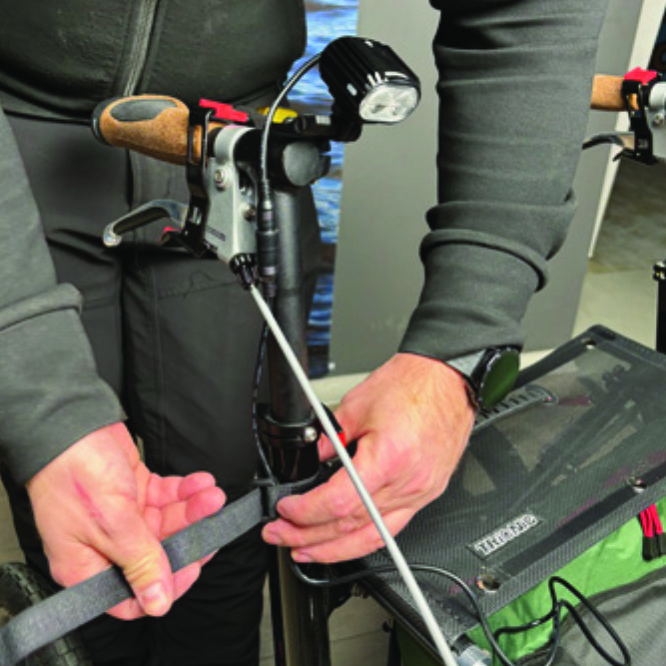
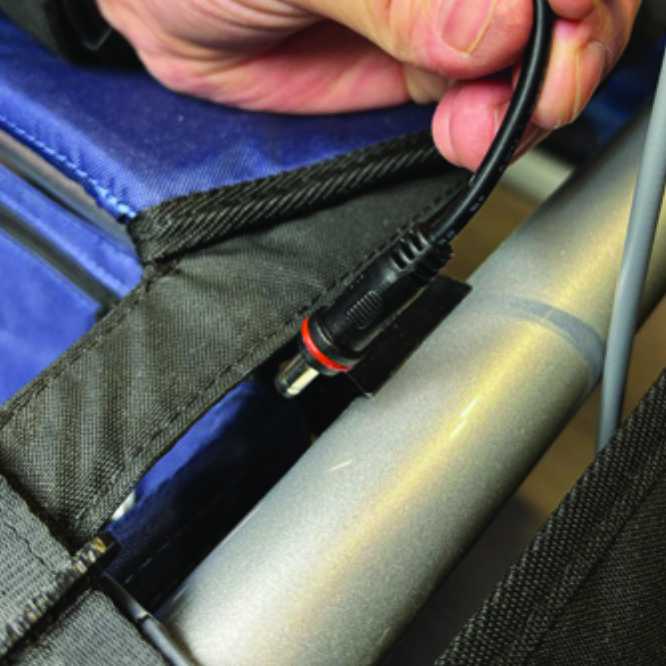
Run the longer extension cable along the semi-vertical grip tube of the Walker and secure it with the included velcro strap.
A8. Run the longer extension cable along the semi-vertical grip tube of the Walker and secure it with the included velcro strap.
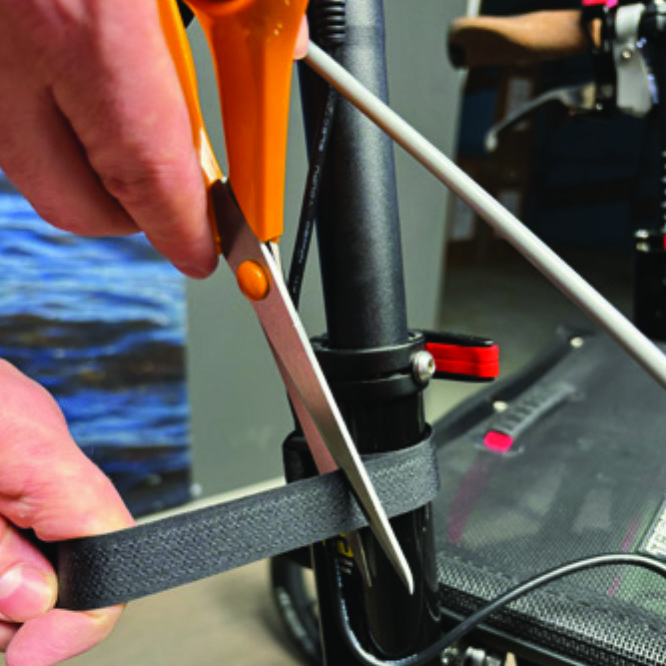
You can cut the excessive length of the velcro strap with a pair of scissors.
A9. You can cut the excessive length of the velcro strap with a pair of scissors.
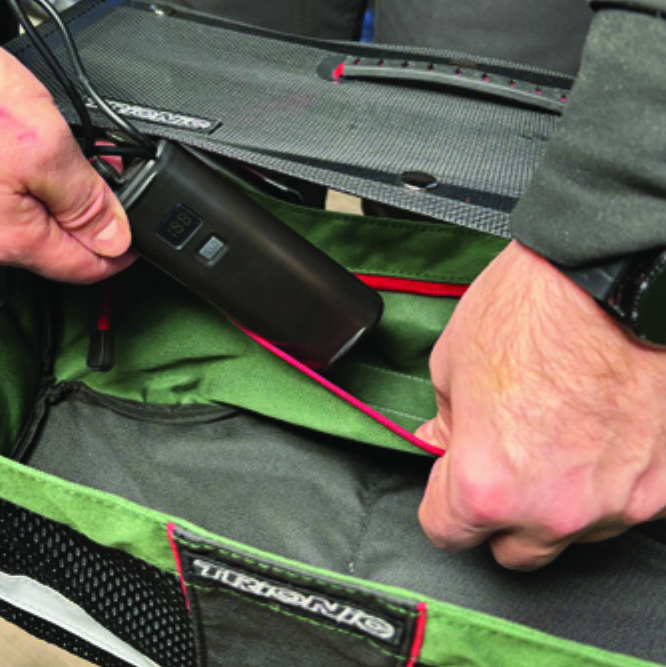
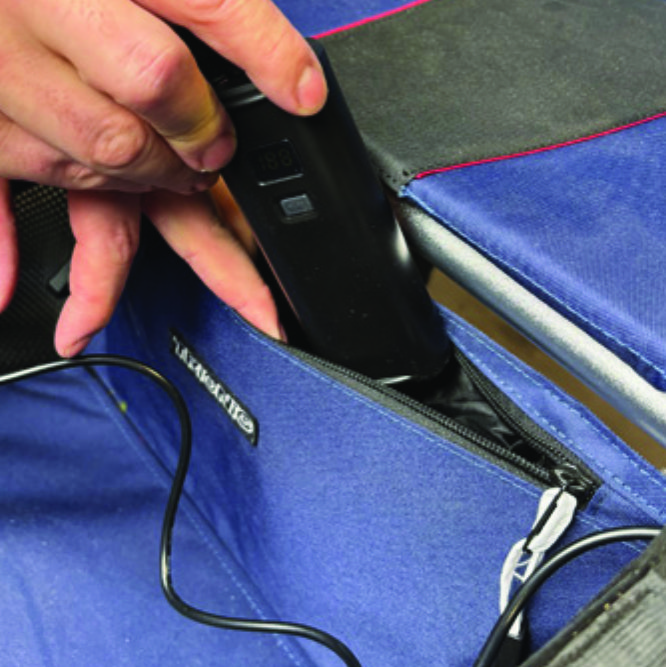
Place the battery pack in the rear zippered pocket of the basket.
A10. Place the battery pack in the rear zippered pocket of the basket.

Instructions for a Veloped

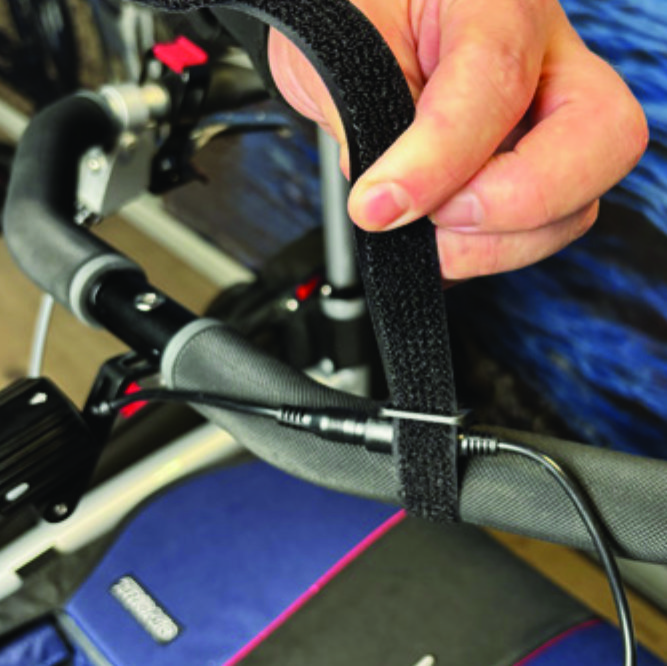
Run the longer extension cable along the U-shaped grip bar of the Veloped and secure it with the included velcro strap.
B8. Run the longer extension cable along the U-shaped grip bar of the Veloped and secure it with the included velcro strap.
You can cut the excessive length of the velcro strap with a pair of scissors.
B9. You can cut the excessive length of the velcro strap with a pair of scissors.
Place the battery pack in the rear zippered pocket of the basket.
B10. Place the battery pack in the rear zippered pocket of the basket.

The package contains

How to operate the light

Kundenbewertungen

Seien Sie die erste Rezension zu diesem Produkt

Allgemeine FAQ

Relevant Guides

Search help

Bereits gekaufte Artikel

Kundenbewertungen    

  • Ich habe soeben den Walker & das Veloped erhalten…

    Beides sind erstaunliche Geräte, und ich habe keinerlei Zweifel, dass sie mir einen großen Nutzen bringen werden.
    Die Qualität der Konstruktion ist wirklich exzellent, und das zeigte sich direkt, als ich die Kartons öffnete. Diese beiden Maschinen …

  • Das Veloped hat mein Leben verändert - Hurra!…

    Mein Fahrradunfall vor vier Jahren hat mich so schlecht ausbalanciert, dass ich mit einem Stock zu Fuß gehen musste. Tatsächlich war ich sehr zurückhaltend, selbst kurze Strecken zu bewältigen. Es gibt den Standard-Rollator in rot, den viele ältere M…

  • Das Veloped Sport…

    Das Veloped Sport. Ich habe meines jetzt seit einem Monat und bin davon begeistert! Bevor ich mir das Becken brach und einen bleibenden Nervenschaden im Bein davontrug, war ich ein begeisterter Wanderer. Ich habe daran gearbeitet, so mobil wie möglic…

  • Hervorragendes Produkt…

    Nach dem Kauf eines Veloped Tour im Jahr 2014 hatte ich kein Zögern, den 9er Rollator zu kaufen, um mir zu Hause zu helfen. Er ist wesentlich robuster als andere Rollatoren, die ich versucht habe, mir die Unterstützung zu geben, um mein Gleichgewicht…

  • Stabile Bewegungsfreiheit mit optimaler Bremswirkung…

    Bin ohne Rollator oder beidseitige Gehstützen auf Dauer ortsgebunden. Habe im Laufe der Jahre mehrere Rollatoren ausprobiert wie den Nitro, den Topro Troja, den Alevo Carbon.
    Bei allen Rollatoren ist der größte Schwachpunkt die Bremsen.

    Hatte sch…

  • Froh, dass ich ihn habe!…

    Ich musste ihn noch nicht benutzen, aber ich bin froh, dass ich ihn habe.…

    CST Schlauch 14"
    von Carolyn MacLean
  • Es geht nicht besser!…

    Niemals werde ich auf das große Hilfsmittel verzichten, das mir so viel Lebensfreude zurückgegeben hat! Wegen der Multiplen Sklerose konnte ich mich leider nicht mehr in der Natur bewegen. Das hat mich in den Ferien an der Nordsee sehr geärgert. Kein…

  • Tolles Teil,…

    lässt sich wunderbar handhaben, ich hätte allerdings den Kofferraum meines Wagens vorher messen sollen, naja Rücksitze umlegen geht auch. Ob ich nu viel unterwegs war? Leider nicht, Familienangelegenheiten zum einen, Klinikaufenthalte bei mir usw. Nä…

  • Kann wieder im Freien laufen…

    Der Trionic Veloped Sport war eine hervorragende Anschaffung. Aufgrund einer zerebellären Ataxie kann ich ohne Rollator nicht mehr laufen. Mit diesem Gerät kann ich wieder draußen laufen, was großartig ist! Es ist jeden Cent wert.…

Abonnieren Sie den Newsletter