


1600 Lumen Trionic LED Frontleuchte mit Akkupack
In dieser Anleitung wird sowohl die Befestigung des Lichthalters und des Lichts an einem Walker (linke Spalte unten) als auch die Befestigung an einem Veloped (rechte Spalte unten) gezeigt.
Auf dem linken Foto zeigt A die Halterungsbefestigungsteile für einen Walker (2 Schrauben + 2 Unterlegscheiben). B zeigt die Halterungsbefestigungsteile für ein Veloped (1 Schraube + 1 Rändelmutter + 1 Mutter).

Anbringen des Lichthalters
Anleitung für einen Rollator
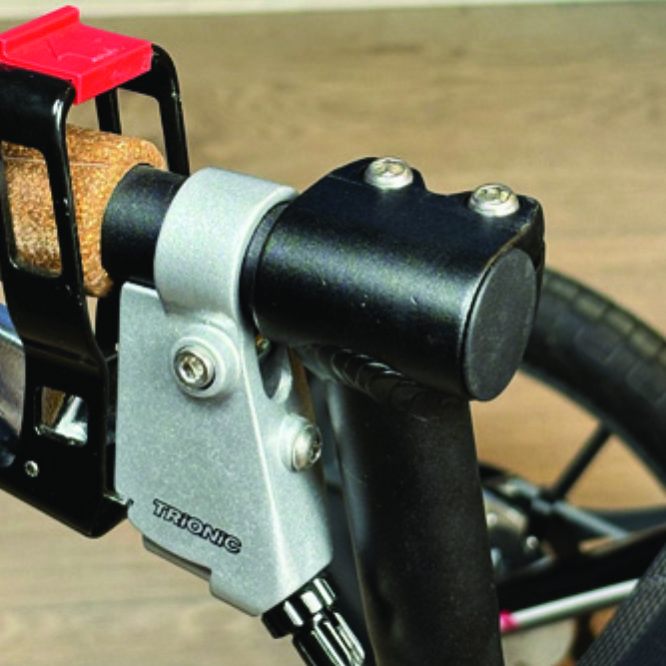
A1. Suchen Sie oben auf dem schwarzen halbvertikalen Rohr die beiden Schrauben, die das Griffrohr vor dem Bremshebel festklemmen.
A2. Lösen Sie beide Schrauben mit dem 5mm Inbusschlüssel, der der LED-Leuchte beiliegt.
A3. Die beiden Schrauben von der Griffklemme entfernen.
A4. Platzieren Sie den Lichthalter mit der runden und geschlitzten Lichtaufnahme nach vorne oben auf der Griffklemme. Führen Sie die beiden Schrauben mit Unterlegscheiben in die Löcher der Klemme ein.
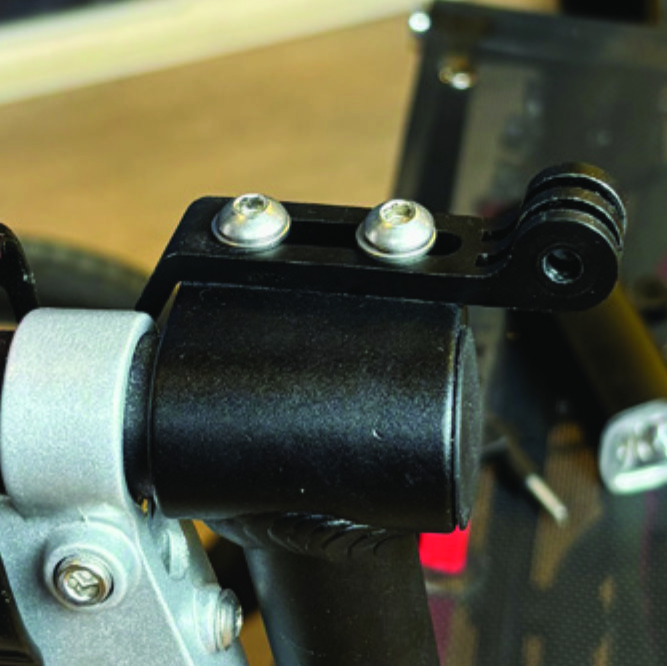
A5. Ziehen Sie die beiden Schrauben mit dem 5-mm-Inbusschlüssel fest. HINWEIS: Es ist wichtig, dass Sie die Schrauben richtig festziehen, da sie das Griffrohr mit seinem Gummigriff und dem Bremshebel sichern.
Anleitung für ein Veloped
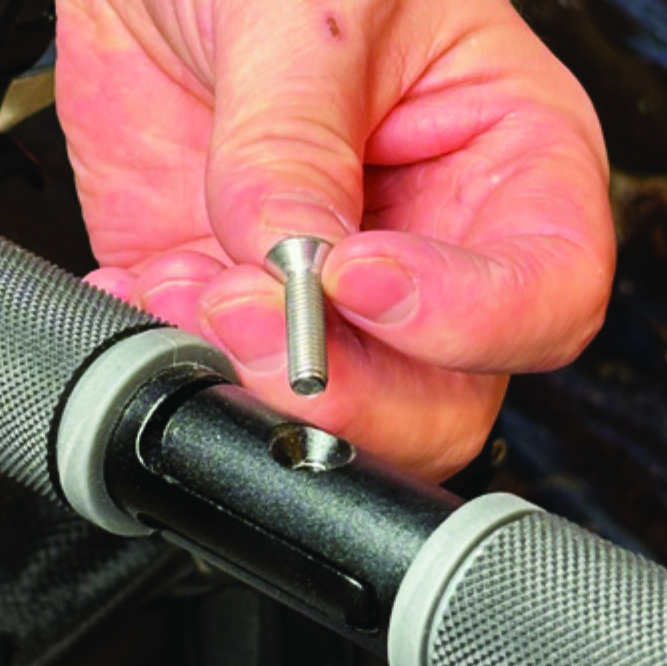
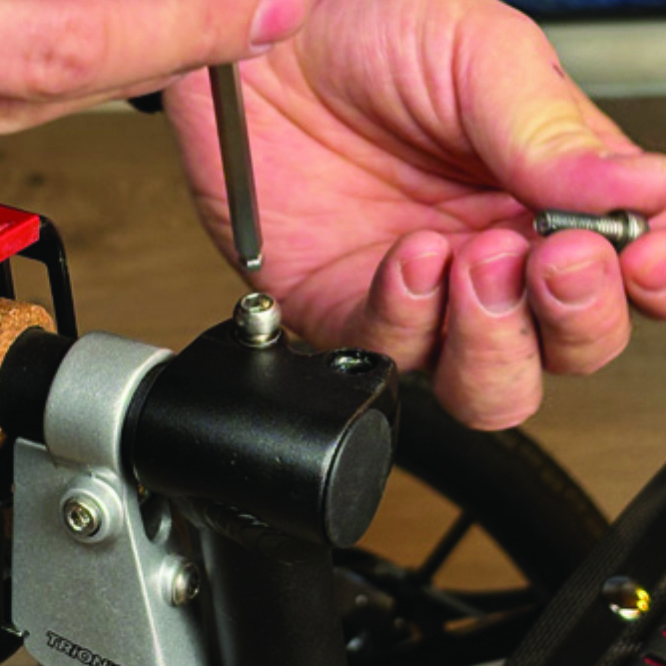
A1. Suchen Sie die Schraube am mittleren Klappscharnier des U-förmigen Griffbügels des Velopeds. Lösen Sie die Schraube mit dem mitgelieferten 4-mm-Inbusschlüssel und entfernen Sie sie.
B2. Ersetzen Sie die alte Schraube durch die längere Schraube, die im Lieferumfang der LED-Leuchte enthalten ist. Befestigen Sie die längere Schraube am Scharnier und ziehen Sie sie mit dem 4-mm-Inbusschlüssel fest.
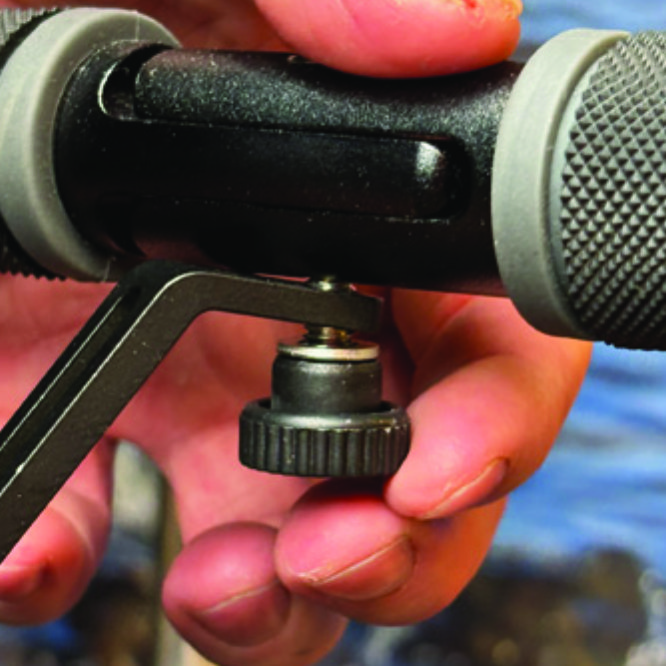
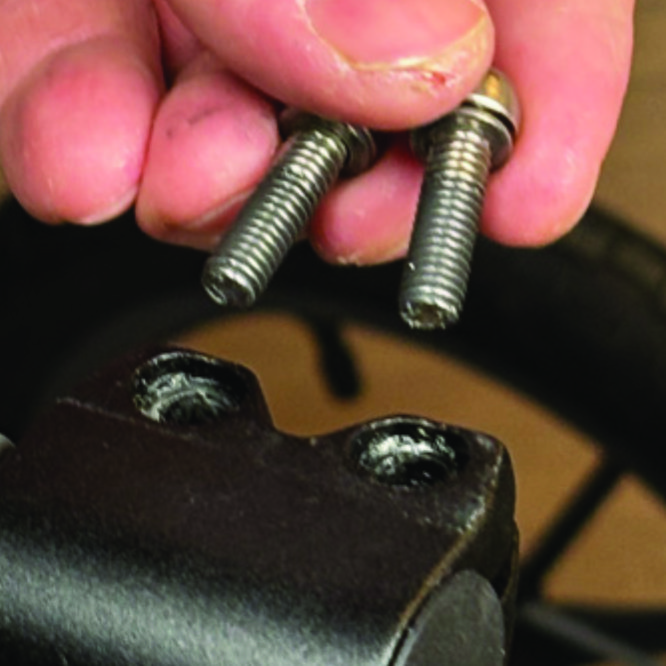
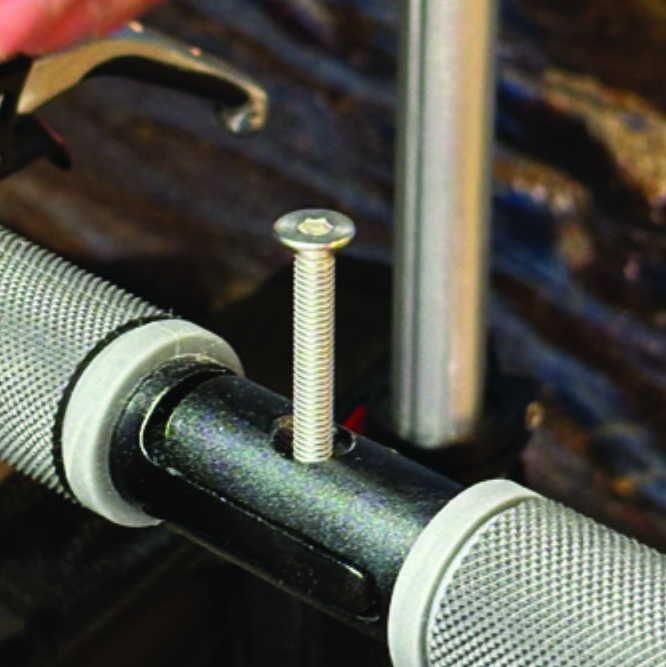
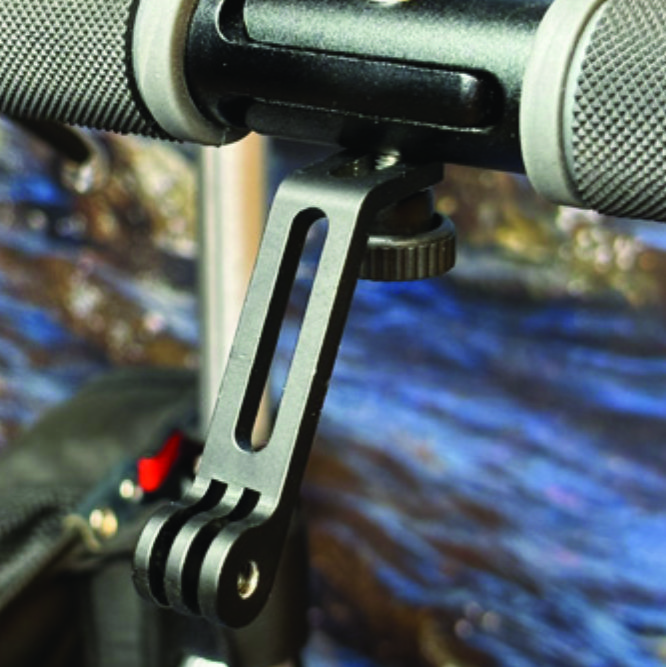
B3. Befestigen Sie das kurze, abgewinkelte Ende des Leuchtenhalters am unteren Ende der Schraube an der Unterseite der Griffstange. Befestigen Sie den Halter mit einer Unterlegscheibe und der Rändelmutter.

B4. Für eine sicherere Befestigung des Halters, um ein unbeabsichtigtes seitliches Drehen des Halters zu verhindern, ersetzen Sie die Rändelmutter durch die mitgelieferte Edelstahlmutter und ziehen Sie diese mit einem 10-mm-Schraubenschlüssel fest.

B5. Auf diesem Foto ist der Leuchtenhalter im korrekt angebrachten Zustand zu sehen.
Anbringen des LED-Lichts an der Halterung
Anleitung für einen Rollator

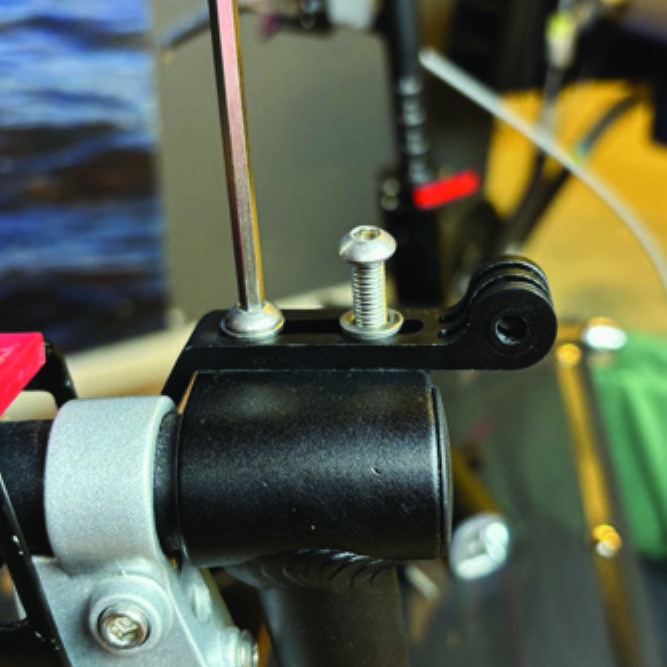
A6. Identifizieren Sie das runde vordere Ende des Lichthalters mit zwei Schlitzen zum Anbringen des Lichts.
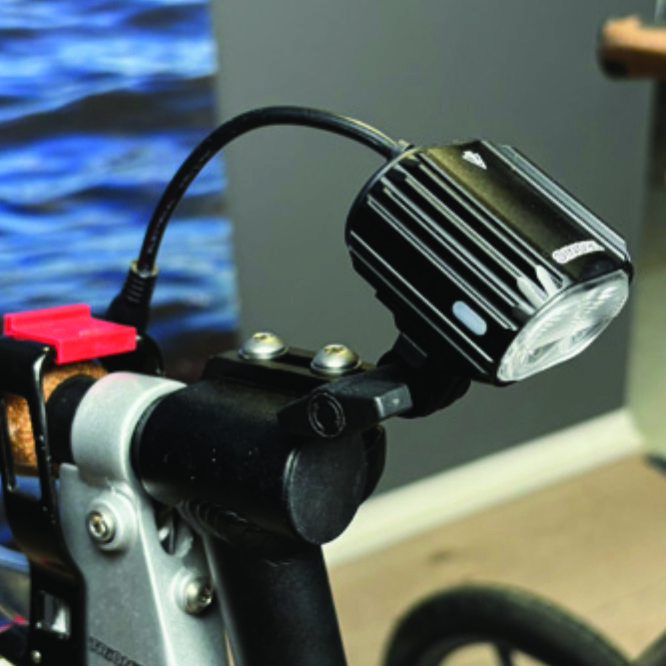
A7. Schieben Sie die Schlitzhalterung der Leuchte in die Schlitze der Halterung und achten Sie auf deren Ausrichtung. Führen Sie die mitgelieferte Flügelmutter in Fahrtrichtung des Walkers gesehen von links ein und ziehen Sie diese fest.
Anleitung für ein Veloped
B6. Suchen Sie die Schraube am mittleren Klappscharnier des U-förmigen Griffbügels des Velopeds. Lösen Sie die Schraube mit dem mitgelieferten 4-mm-Inbusschlüssel und entfernen Sie sie.

B7. Identifizieren Sie das runde vordere Ende des Lichthalters mit zwei Schlitzen zum Anbringen des Lichts.
Einsetzen des Akkupacks
Anleitung für einen Rollator
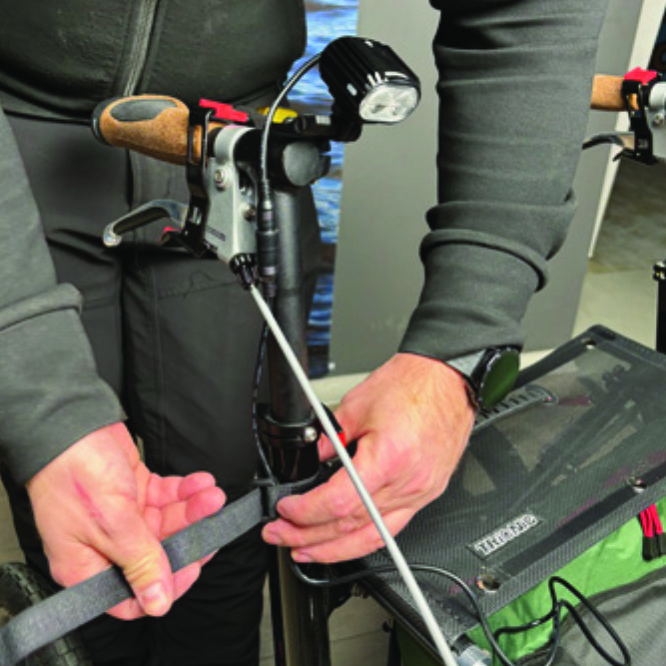
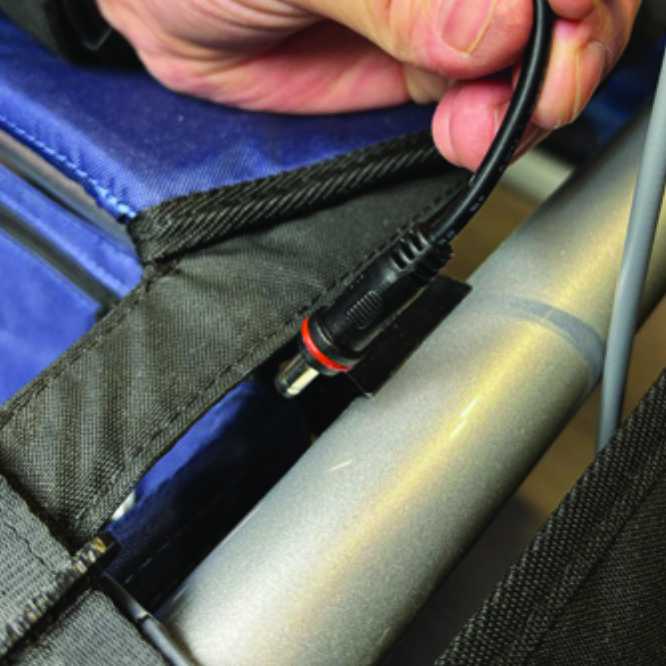
A8. Führen Sie das längere Verlängerungskabel entlang des halbvertikalen Griffrohrs des Walkers und befestigen Sie es mit dem mitgelieferten Klettband.
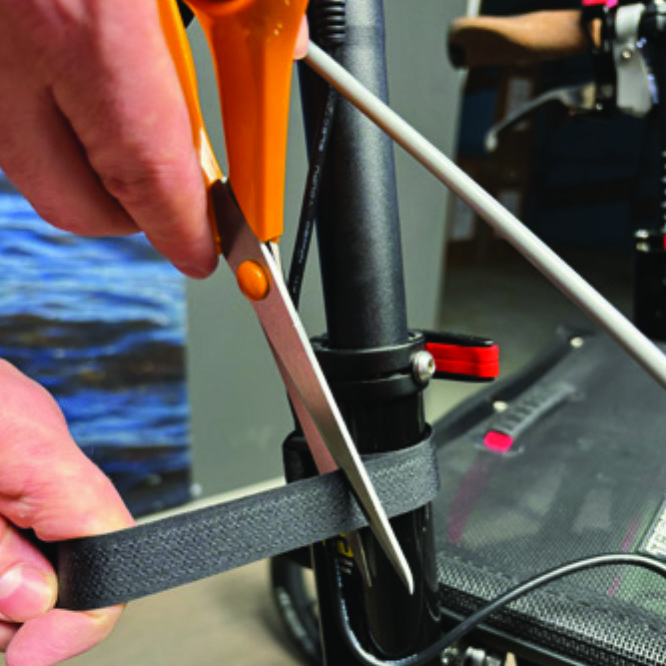
A9. Die überschüssige Länge des Klettbandes können Sie mit einer Schere abschneiden.
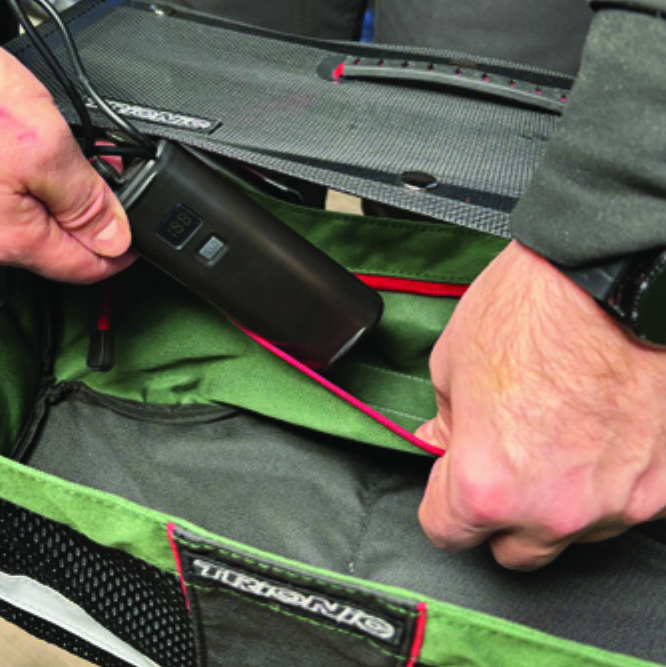
A10. Legen Sie den Akku in die hintere Reißverschlusstasche des Korbs.
Anleitung für ein Veloped

B8. Führen Sie das längere Verlängerungskabel entlang der U-förmigen Griffstange des Velopeds und befestigen Sie es mit dem mitgelieferten Klettband.
B9. Die überschüssige Länge des Klettbandes können Sie mit einer Schere abschneiden.
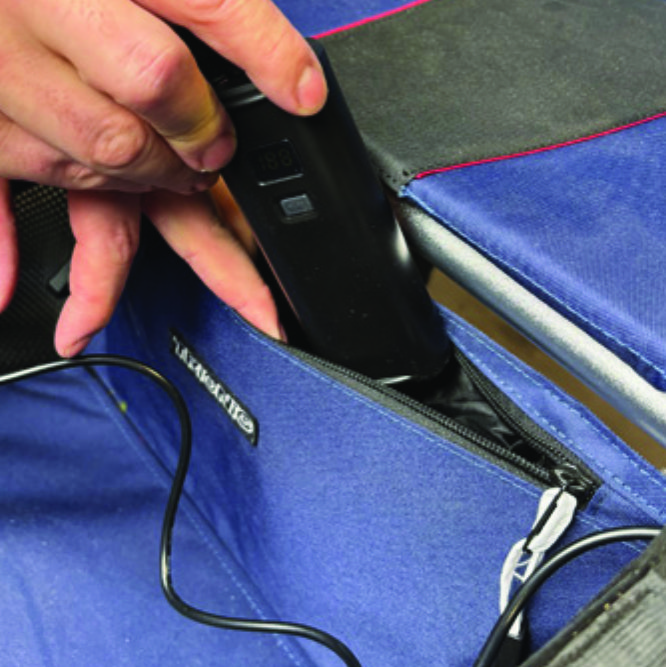
B10. Legen Sie den Akku in die hintere Reißverschlusstasche des Korbs.
Das Paket enthält

So bedienen Sie das Licht


